- Home
- Blog
- Contact
WPHarvest
The ultimate guide to speedy WordPress sites
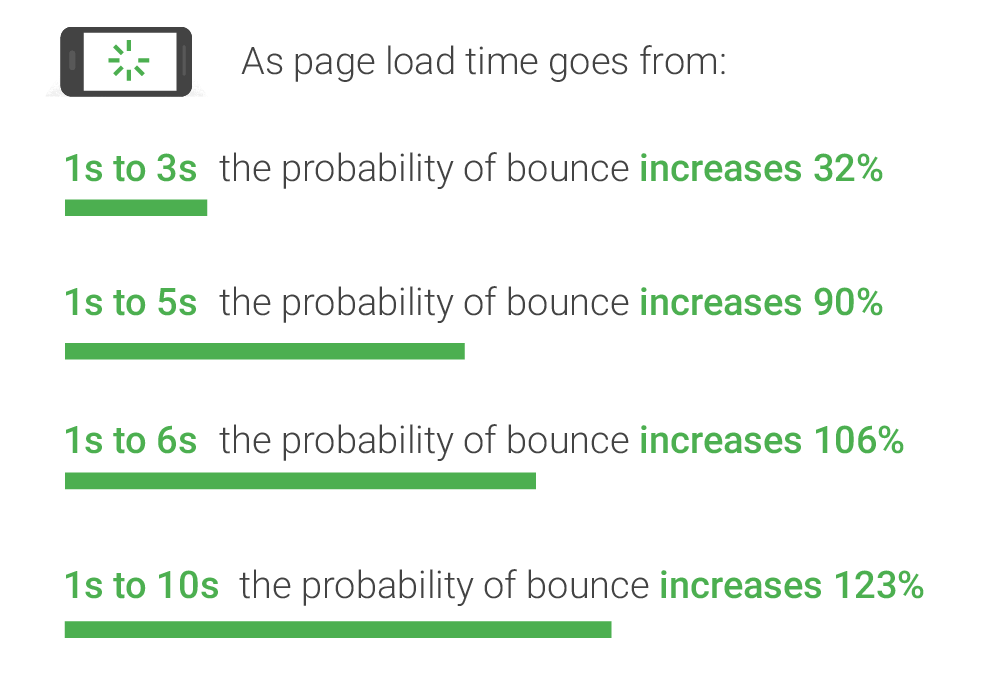
We are all aware of how important the speed of your website is to your business. The slower our website is, the higher the bounce rates and loss of business.
Each website is different, and we need to be realistic with our goals. A static website such as this blog has the potential and should easier be faster than a dynamic site, such as a trendy eCommerce website. We shouldn’t necessarily feel the need to aim for a score 100/100 as often times it is impossible, especially if you are using third-party tracking services, but the higher is definitely the better.
Page speed tools
There are numerous ways/tools out there that can test the speed of your website. Some of the most popular ones include:
- PageSpeed Insights
- GTMetrix (the one we will be using in this guide)
- Pingdom
- Google Chrome’s in-browser Audit
Getting started
In this guide, we will be focusing on the suggestions provided by GTMetrix. We will skip the ones that are more backend/server specific and the ones that are generally sorted by default by our hosting provider, and focus on the ones that we can make an impact on.
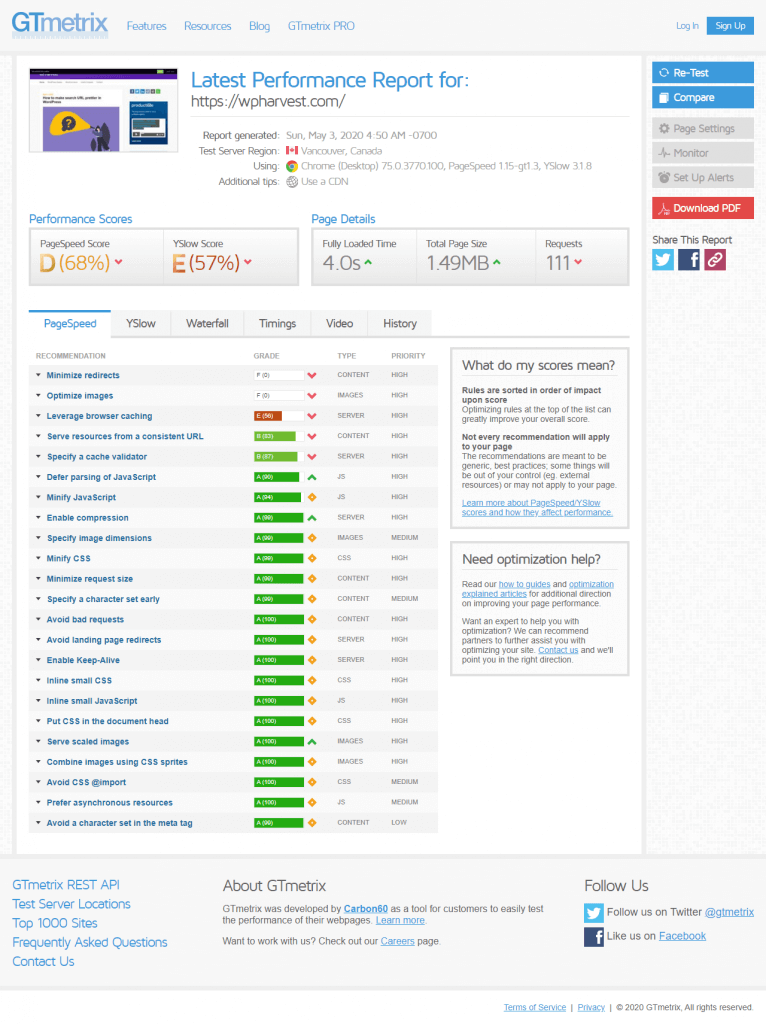
Getting started, once we have entered our website into the tool, we will be getting a report similar to this one:
Optimise images
Images can hold a lot of information that may not be needed, such as location and other meta, which we can live without. Such optimisation is known as lossless, meaning the quality of the images is not affected at all.
Lossy optimisation on the other hand does affect the quality of the image, but this is not something to necessary be scared of. A slight quality loss can often go unnoticed by the human eye, and if that quality loss ultimately helps increasing your website’s engagement and sales, then we need to take advantage of it.
In this example, we will be using the free plugin by TinyPNG. Their API allows for up to 500 free optimisations a month, which is often enough for small/medium-sized sites. Isn’t that nice of them!
As you can see in my report above, my score on this is as low as it can be. so let’s see how much can we gain here.
After installing the plugin, I have done a Bulk Optimisation of the entire library.
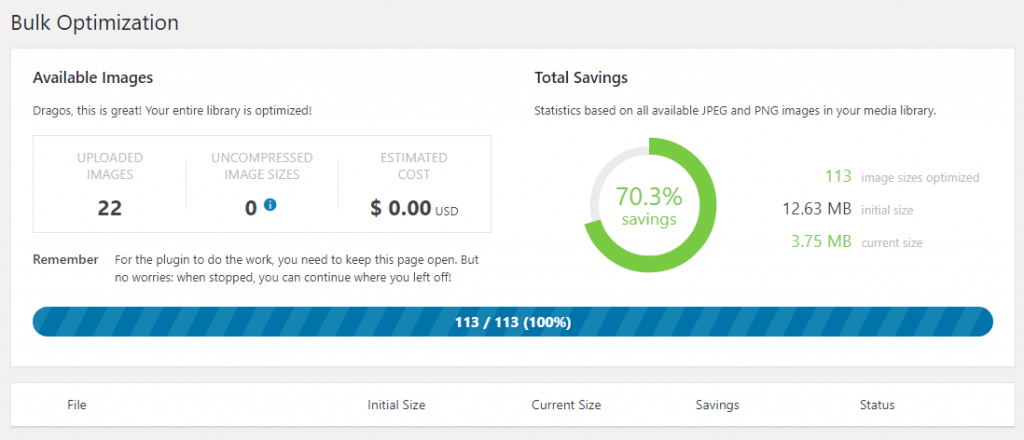
In my case, I got a 70.3% saving, going from 12.63MB to 3.75MB, ultimately saving me (uhm…12.63 minus 3.75…) 8.88MB!
Another great, probably the best, way to optimise resources is by lazy load them. This means that the images will be hidden and not loaded until the user gets to them.
Lazy loading has been done so far using JavaScript, and usually means you need to get a theme that handles that or code it yourself. In WordPress, as we’re used to, there are plugins that can add lazy loading to your site but is generally not as good.
The good news is, lazy loading is slowly being supported by browsers as an HTML attribute, which will be the best way to implement it. The great news is that WordPress 5.5 will add it by default. For more information on this, you can read this article and this article.
Serve scaled images
Optimising the images we used throughout our websites is a good way to save bandwidth and increase page speed, but a very overlooked action we can take when building a speedy site is resizing the images so that they fit the space they are used in. Sure, we should optimise our sidebar image, but first we need to make sure we don’t use a 2000×2000 image on a 500px wide sidebar.
WordPress is helpful here by not only allowing us to set different images sizes and get resized and cropped automatically but also uses the srcset attribute when displaying images via their functions. The attribute allows the browser to select the smallest image from the list of resized images, that is big enough to fit the space.
Specify image dimensions
Setting specific widths and heights to our images results in faster rendering. Not setting them will increase the number of reflows and repaints the browser has to do in order to determine the right size.
Combine images using CSS sprites
Icons are a great way to enhance our designs and make our websites looks slicker. They are also helpful in creating minimal navigation using a visual representation instead of using lengthy words.
Each icon can also represent an extra request made by the browser, in order to combat that we can use CSS stripes. A service that can provide us with a large library of icons is the well known Font Awesome.
Minify JavaScript and CSS
When building themes and plugins, it is recommended that we minify our assets. This can be done using Gulp or Grunt. This action condenses the code by removing empty spaces and renaming function names, so that the file is much smaller making it quicker to download, without affecting the actual code.
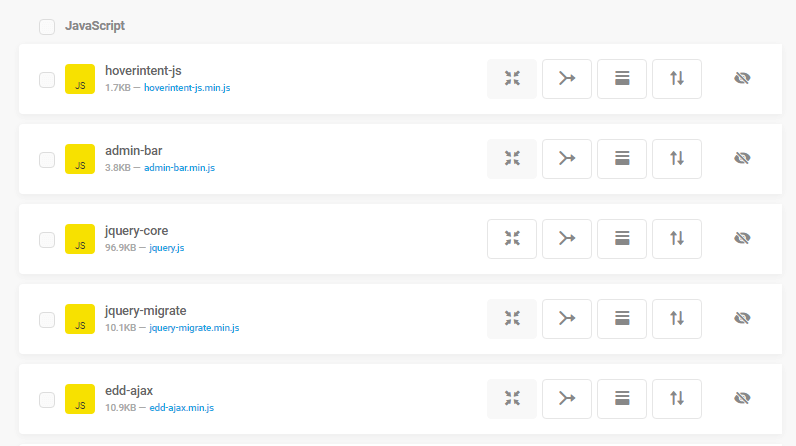
Not all developers minify their code which means we need to find a way to do it ourselves. If you remember from the previous point, the plugin we have used throughout our guide can help us with this. As you can see in my screenshot, 4 out of 5 assets are already minified, so the only one remaining in my case is jquery-core.js
Inline small CSS and JavaScript
If you are importing external files but those only contain small amounts of code, it is worth moving them inline, inside the HTML, so that we save the extra request(s). Although most of us developers don’t like the idea of inlining CSS and JavaScript, in small amounts could be more beneficial than importing them from separate files.
Defer parsing of JavaScript
Defer parsing means we need to load the JavaScript files in after the initial page load (where possible) so that the browser doesn’t have to deal with those from the offset. This can be archived by adding defer or async to our <script> tags.
The first step is when we are enqueuing the scripts in our theme, to set the “in_footer” argument to true. This will move the assets to the footer thus delaying their load until the end. If the assets we want to move are part of plugins or if you don’t want to modify the theme, then the Asset Optimization option in Hummingbird will come in handy. There we will find options to compress, combine assets, move to footer or force load after the page has loaded.
If you want to add the defer attribute instead in a more advanced way, you could do so by adding the following code into your functions.php file:
function wpharvest_defer_parsing_of_js( $url ) {
if ( is_user_logged_in() ) return $url; // don't break WP Admin
if ( FALSE === strpos( $url, '.js' ) ) return $url;
if ( strpos( $url, 'jquery.js' ) ) return $url;
return str_replace( ' src', ' defer src', $url );
}
add_filter( 'script_loader_tag', 'wpharvest_defer_parsing_of_js', 10 );Code language: PHP (php)Avoid CSS @import
Using @import in our stylesheets can also slow down the page load by adding to the number of requests. For this reason, it is not recommended. If we want to keep our development files separated, we can use Gulp to combine and minify the stylesheets instead.
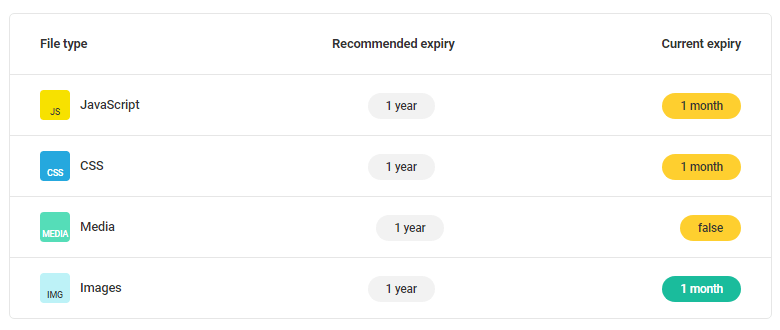
Leverage browser caching
Caching is another step in our optimisation mission. Our websites uses assets such as images, stylesheets, scripts which the visitors need to download each time. This is a waste of not only load time, but also of server resources. What browser caching does is it asks the visitors to save those assets locally on their browser, so they don’t have to ask for them afterwards.
In order to achieve this, in this example we will use the free version of the Hummingbird plugin. There are a few other great plugins out there that people swear by, such as W3 Total Cache, WP Fastest Cache and Autoptimize.
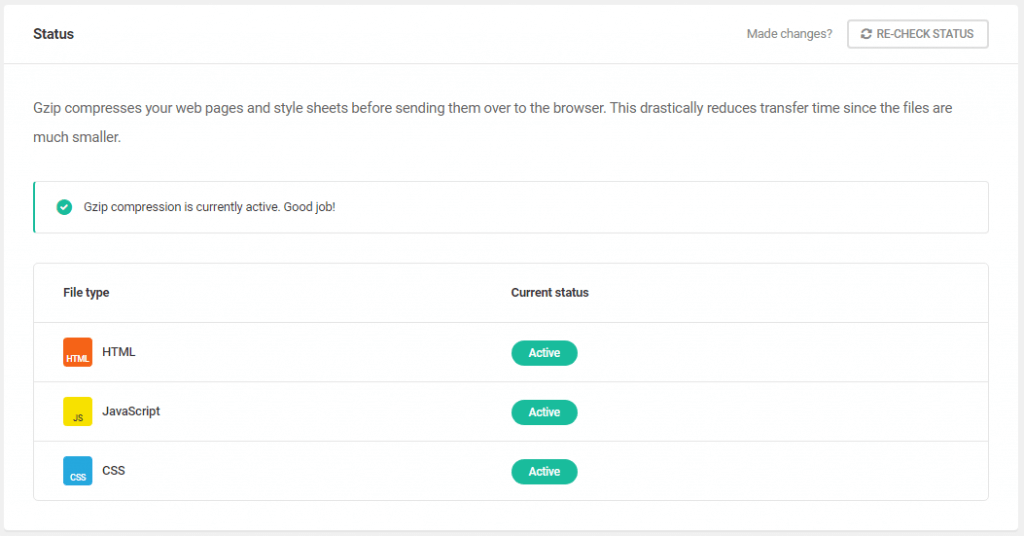
Enable compression
Server compression reduces the size of the files being sent across which in turn results in faster websites. The Hummingbird plugin can do this for us by enabling Gzip Compression.
Specify a cache validator
This is a server related setting which is saying that assets should have a Last-Modified or ETag header set so that the browser can better cache them. Our caching plugin will also deal with this, and in my case is not perfect because of some third-party tracking scripts that I am using.
Minimise redirects
Redirects are generally bad because they unnecessary add to the load time. If for example your links point to /news but you have a redirection in place that takes you to /insights then this is an extra step which needs to be removed. You might need in this case to adjust the link to point straight to /insights. Also, you may have noticed I didn’t add a trailing slash at the end of my links. This again adds another redirect because links should end with a trailing slash, ie /insights/.
In my case, I am using third-party scripts that create redirects for other resources and I am unable to fix it, unless I decide I can live without those scripts.
Serve resources from a consistent URL
Resources such as css, js and images should be loaded from the same URL as that saves the browser to do multiple round trips, thus quicker load time.
In my case, I am only have 83% because it seems something is loading some third-party scripts twice, but from slightly different urls.
Minimize request size
This is a more developer-focused point, but essentially, when sending cookies and headers, these should ideally be as small as possible so that they fit in a single packet and so reducing the number of packets being sent.
Conclusion
I hope you found this guide helpful and inspired you to pay more attention to the little things that we can do that have a big impact on your overall page speed. If have any suggestions, tips, questions, or simply want to share anything, feel free to leave a comment below.